

Inspirations
Friday the 13th
|
Batman Begins
|

The Orphanage
|

Carrie
|
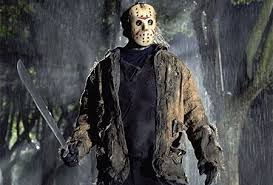
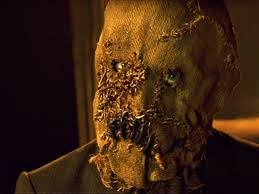
The idea of using a mask and the mask's distinctive style for the antagonist came from the Friday the 13th movie. We later also drew inspiration from the scarecrow in Batman Begins and the masked child in The Orphanage. The costume for the other characters were inspired by Carrie since the antagonist is getting picked on by them. This is in accordance with the setting which is a college so they are dressed in casual clothing.
Make-Up
Fake Blood
|
#1 - I like this tutorial because the instructions are clear and concise and unlike many of the other tutorials there are given measurements for the products used. The tools and products used are usually stocked in supermarkets and are easy to get hold of and are edible, making it safe to use. However, I personally found getting hold of the light corn syrup very difficult and had to look for an alternative, so it would've been nice for alternatives to have been mentioned. In addition particular brands of each of the products that would have been appropriate for this could have been suggested, which would've come in handy for many viewers that are most likely beginners, e.g. I found that when I used regular food colouring it didn't produce the bloody red that I was after.
|
#2 - I liked this because of its simplicity and the products used are edible and easy to obtain, making it safe to use. Although there isn't any guidance for measurements this allows for flexibility depending on how much fake blood is required, something which I find works for me as following tutorials step-by-step doesn't always produce identical results as desired. However, for its simplicity I felt it could have been more concise.
|
#3 - I like how minimalistic and simple this tutorial is - a minimal amount of products and easy-to-get-hold-of tools were used. The result was very good in my opinion. However I do think this would require practice and picking the most appropriate type of products used as they can have variations, e.g. one brand of red food colouring might not be as rich in colour as another.
|
|
#4 - The website gives a general overview of how to make the fake blood, but the person in the tutorial most likely has practised this quite a lot. Although demonstrated, the instructions are actually very vague and just a little more guidance would've been more helpful, especially when making a bigger batch than in the second tutorial. On the other hand, this allows for flexibility depending on how much or how little fake blood is needed, something I later found to work better for me as following instructions rigidly didn't always mean I produced a good batch of fake blood.
|
#5 - I liked this tutorial because everything was made very clear and clearly stated where the products could be obtained. The instructions are precise and having someone who is clearly very experienced at stage make-up was good. Although it was very detailed and demonstrated how to make different types of blood which would've come in handy for different parts of the trailer, I thought it could've been more concise as it did drag on.
|
My Recipe
What you will need:
Steps
Tip: when fake blood with gelatine is applied, leave it for just over a minute and it will set. When you have finished, you can simply peel it off.
Below is my video tutorial of the recipe. I can't say the end product turned out well though!
What you will need:
- Treacle (dark corn syrup substitute)
- Chocolate syrup
- Red food colouring
- Blue food colouring
- Flour
- Glycerine
- Gelatine (optional)
- Teaspoon
- Tablespoon
- Something to stir the mixture
Steps
- Pour 16oz (or 454g approx) of treacle into a bowl. This is typically equivalent to your whole tin.
- Add 16oz of chocolate syrup, or until you achieve the brown-red colour typical of real blood.
- Add 1/2 a cup of cocoa powder to add to the brown-red effect.
- Add four drops of red food colouring.
- Add seven drops of blue food colouring.
- Add two drops of glycerine to make it more runny, or flour to make it thicker. Thicker blood appears more coagulated and aged while thinner, more red blood appears fresh.
- If desired, add a sachet of gelatine to the fake blood and stir thoroughly so the gelatine crystals fully dissolve. If you do choose to add gelatine, you must put it in the microwave before use for 10-20 seconds. Make sure it doesn't over-bubble otherwise it will burn and the fake blood will be ruined.
Tip: when fake blood with gelatine is applied, leave it for just over a minute and it will set. When you have finished, you can simply peel it off.
Below is my video tutorial of the recipe. I can't say the end product turned out well though!

Work in progress
|

The end result
|
I attempted to make fake blood for a second time, changing treacle for golden syrup as I thought it was too dark to make it look realistic. My video tutorial is below.
My Altered Recipe #2
What you will need:
Steps
Tip: when fake blood with gelatine is applied, leave it for just over a minute and it will set. When you have finished, you can simply peel it off.
Below is my video tutorial of my altered recipe. The end product turned out significantly better than the first time in terms of consistency and base colour, but still did not have the realistic colour of blood.
What you will need:
- Golden syrup (dark corn syrup substitute)
- Chocolate syrup
- Red food colouring
- Blue food colouring
- Plain flour
- Glycerine
- Gelatine (optional)
- Teaspoon
- Tablespoon
- Something to stir the mixture
Steps
- Pour 16oz (or 454g approx) of golden syrup into a bowl. This is typically equivalent to your whole tin or squeezy bottle.
- Add 16oz of chocolate syrup, or until you achieve the brown-red colour typical of real blood.
- Add 1/2 a cup of cocoa powder to add to the brown-red effect.
- Add four drops of red food colouring.
- Add seven drops of blue food colouring.
- Add two drops of glycerine to make it more runny, or plain flour to make it thicker. Thicker blood appears more coagulated and aged while thinner, more red blood appears fresh.
- If desired, add a sachet of gelatine to the fake blood and stir thoroughly so the gelatine crystals fully dissolve. If you do choose to add gelatine, you must put it in the microwave before use for 10-20 seconds. Make sure it doesn't over-bubble otherwise it will burn and the fake blood will be ruined.
Tip: when fake blood with gelatine is applied, leave it for just over a minute and it will set. When you have finished, you can simply peel it off.
Below is my video tutorial of my altered recipe. The end product turned out significantly better than the first time in terms of consistency and base colour, but still did not have the realistic colour of blood.
My Altered Recipe #3
What you will need:
What you will need:
- Golden syrup (dark corn syrup substitute)
- Chocolate syrup
- Red food colouring
- Blue food colouring
- Glycerine or hot water (optional)
- Icing sugar (optional)
- Gelatine (optional)
- Teaspoon
- Tablespoon
- Something to stir the mixture


Steps
Tip: when fake blood with gelatine is applied, leave it for just over a minute and it will set. When you have finished, you can simply peel it off.
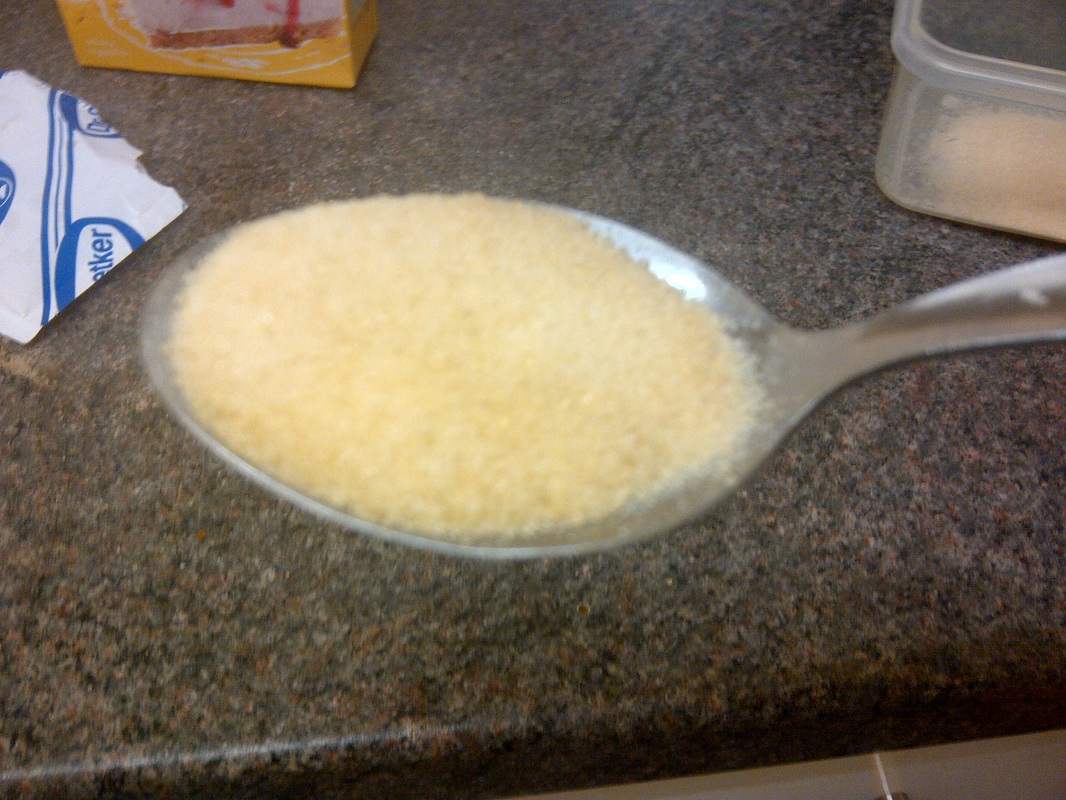
Below is my step-by-step pictorial of my altered recipe. The end product turned out significantly better than the second time in terms of consistency and base colour, but still did not have the realistic colour of blood.
- Pour a small amount of golden syrup into a bowl.
- Add four drops of red food colouring. Stir the syrup and red food colouring together.
- Add seven drops of blue food colouring and stir.
- Add some chocolate syrup and stir.
- Add a few drops of glycerine or hot water to make it more runny, or icing to make it thicker. Thicker blood appears more coagulated and aged while thinner, more red blood appears fresh.
- If desired, add a sachet of gelatine to the fake blood and stir thoroughly so the gelatine crystals fully dissolve. If you do choose to add gelatine, you must put it in the microwave before use for 10-20 seconds. Make sure it doesn't over-bubble otherwise it will burn and the fake blood will be ruined.
Tip: when fake blood with gelatine is applied, leave it for just over a minute and it will set. When you have finished, you can simply peel it off.
Below is my step-by-step pictorial of my altered recipe. The end product turned out significantly better than the second time in terms of consistency and base colour, but still did not have the realistic colour of blood.
Steps


Although this had the deep colour I wanted for the fake blood, it still came out in an unrealistic purple colour. Making fake blood was proving to be difficult and time-consuming, I decided to purchase some ready-to-mix fake blood. It was in the form of a powder which came in a sachet and I followed the instructions.

The film blood, unopened
|
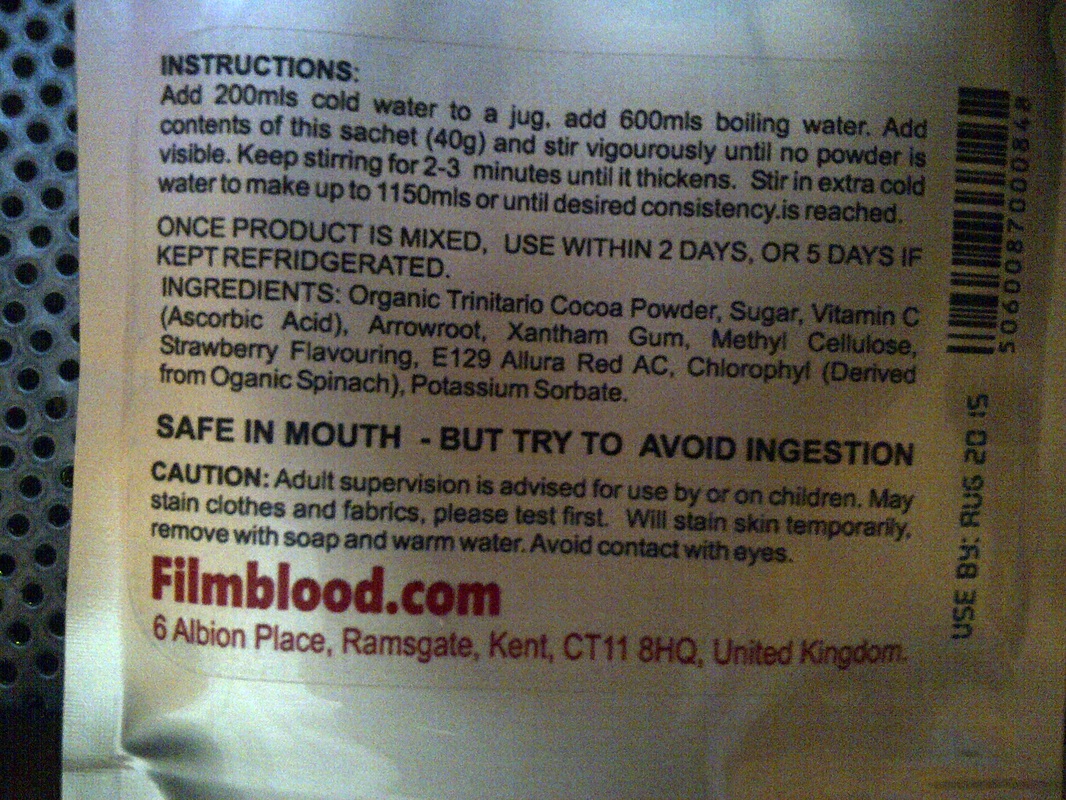
After following the YouTube tutorial the first time and failing to make fake blood, I thought it wise to follow these instructions very loosely. I also did three test runs before making the biggest batch to ensure the blood turned out right. Instead of stirring to thicken, I discovered during my test runs that I had to leave it to stand for about ten minutes before it thickened. A jelly had also formed in the bottom of the container which was meant to be the 'thickness' of the blood but had sunk instead. I ensured this did not happen when I made my big batch by stirring thoroughly.
|

The end result, a million times better than I could've ever done!
This is the big batch of blood I made and this was used in the trailer.
This is the big batch of blood I made and this was used in the trailer.
Blood In Action!
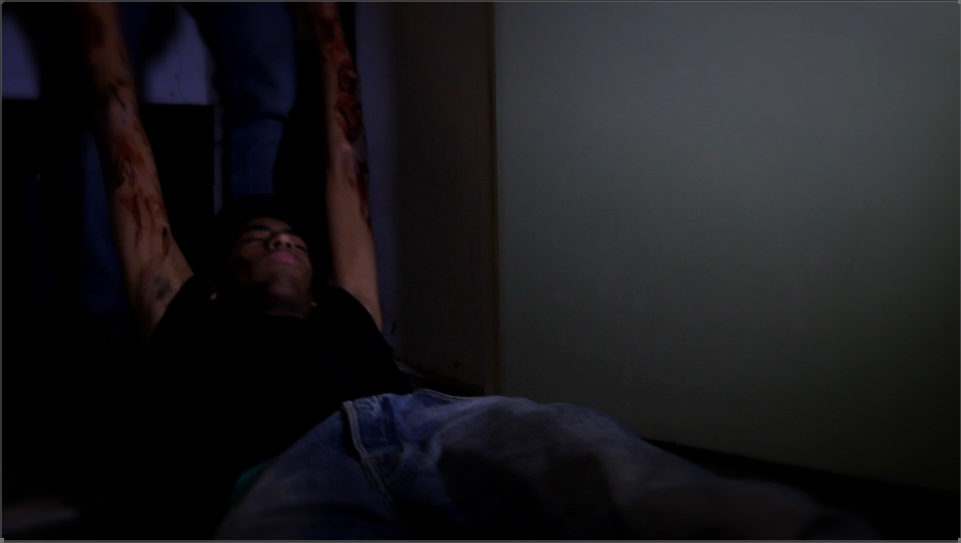
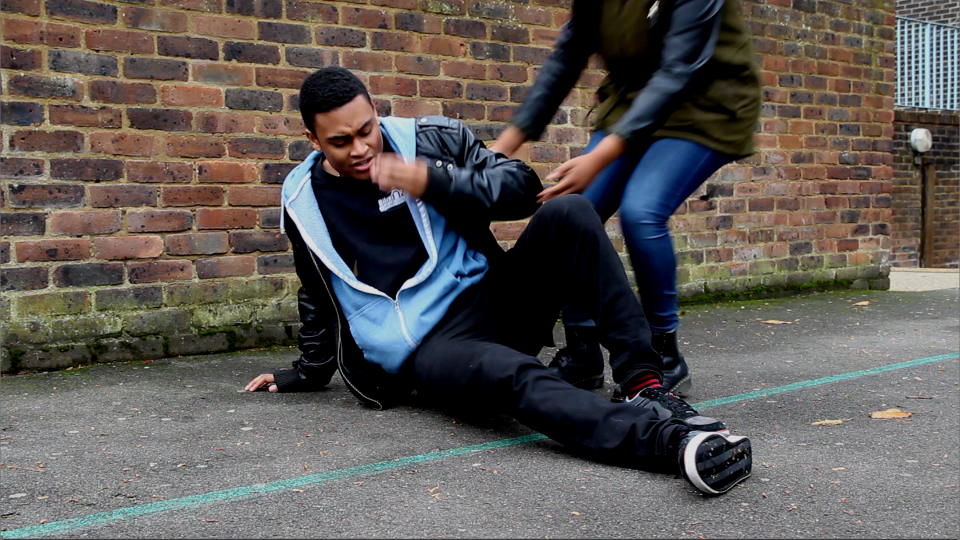
Smeared on this character's arms as he is dragged away by the antagonist
|
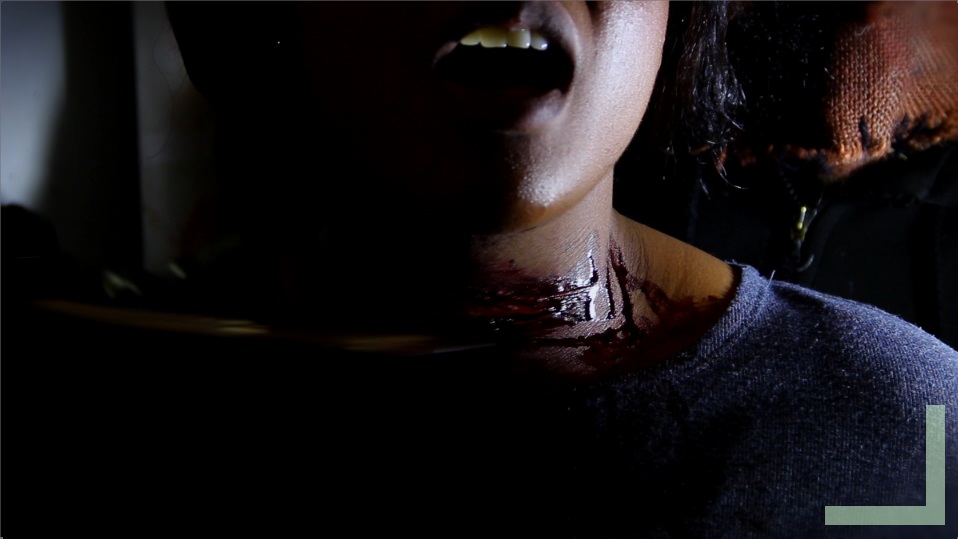
Used on the wound and smeared on this character's shirt
|
Cuts
|
#1 - This was my favourite tutorial out of these as it was really quick and easy to follow and the make-up artist made it look effortless with a very realistic result on a passer-by, with industry-standard products used instead of alternatives that might not produce as good a result. I also liked the improv with the broken CD case, which was a also a lot safer than using glass. It would've been good to name or recommend particular brands or products and say where you could get them from.
|
#2 - I liked how easy this was to follow and I prduced an identical result to the one in the tutorial. However, when it came to trying to use the gel to make a fake wound I found it very difficult and it got very messy. From this I gathered that the person in the tutorial has had a lot of experience and practice making these. I found easier solutions using scar wax so I focused more on gathering information on making wounds with that as it seemed a lot easier to use.
|
#3 - This was detailed and very step-by-step which I liked but I thought it could've been more concise as I had quickly got the hang of what to do at the different stages throughout the tutorial but certain parts dragged unnecessarily. The end result was what I wanted to achieve.
|
|
#4 - Although it was kept short I thought the products could have been explained more and could've been listed at the beginning to make it clearer for the viewer. I did like the end result but it could've been more detailed with more guidance and there was no detail about where to get the fake blood from or how to make it at all. However instructions were clear which produced a good result (presumably with practice).
|
#5 - I liked this tutorial because it was a lot simpler than the others and used a minimal amount of products and tools that you could find easily and would be really good for complete beginners. The only letdown about this is that for the given timeframe of four hours we'd have for filming, this method wouldn't be appropriate.
|
My Method
What you will need:
What you will need:
- One sachet of gelatine
- Glycerine
- Fake blood
- Petroleum jelly
- Foundation or flesh-coloured body paint
- A cocktail stick or something pointed
- Bowl


Steps
Making the gelatine solution (used to model the wound)
Making the gelatine solution (used to model the wound)
- Put two parts gelatine, glycerine and hot water into a microwaveable container (1 part = 1 tsp).
- Stir until it becomes one big lump.
- Put your mixture into a microwave for 20 seconds on the high setting.
- Take it out and stir again to ensure the gelatine crystals are fully dissolved.
- Use a brush or spatula to model the gelatine solution on an area of your skin in your desired shape of wound and leave to set for a minute.
- Add additional make-up, fake blood and texture by stippling with a sponge as desired.


The end result which formed a rubber-like solid (after refrigerating the liquid solution overnight)
The gelatine solution should be kept in a fridge and can be liquified again by putting it in the microwave for 20 seconds on the high setting.
Creating the wound
As I felt my make-up skills weren't up to the standard required to make a fake wound with the gelatine solution, I decided to purchase some scar wax as it would've made the fake wound a lot easier to make.
- While wet, apply your gelatine solution in the area and shape as desired.
- Flatten and blend edges of the gelatine solution into the skin with the spatula to create a more realistic effect.
- Draw a line in the middle of the area with your cocktail stick where you have placed your gelatine solution and carefully split.
- Apply fake blood and spread around the wound to create a realistic effect.
- Air-dry for just over a minute so the gelatine solution sets.
As I felt my make-up skills weren't up to the standard required to make a fake wound with the gelatine solution, I decided to purchase some scar wax as it would've made the fake wound a lot easier to make.

Scar wax
I followed Tutorial 3 as a guide. I made some alterations to the process of making the fake wound, in accordance with time constraints, materials and tools I had available.
Steps
Steps
- Take some scar wax and mix with some foundation or skin-coloured paint. Manipulate in your hands to soften.
- Roll into a sausage-like shape and place on the area of the skin where your fake wound will be.
- Flatten the edges of the wax and blend into the skin with a plastic knife. Add more foundation or skin-coloured paint is needed.
- Cut a slit in the middle of the wax. Dab some fake blood here and in the surrounding area.
Fake Cut In Action!

Bruises
|
#1 - At first this tutorial seemed quite ridiculous. Using felt pens to make a fake bruise wasn't something I was convinced would work well at all, but I was curious so I watched and it looks silly to be honest. The idea of using felt pens would be perfect for complete beginners or those on a tight budget. Although it could've been better, the end result wasn't too bad at all.
|
#2 - Although the make-up artist made it look effortless, I found this pretty hard to pick up and I resorted to using another of her tutorials (#3) which I found a lot easier to follow and get the hang of. In addition some of the tools used aren't easy to obtain, Overall another tutorial would have been more helpful. On the flipside the result was really good :)
|
#3 - I found this tutorial to be much more helpful than #2. At first I found it slightly confusing but I found when I did use this method to recreate this bruise the end result was very good and it was actually really simple to do. I like how different types of bruises are explained and how you could recreate these. This was particularly handy as this could be done anywhere on the body, rather than somewhere specific like the eye that requires skill and attention at make-up artist level.
|
|
#4 - This tutorial was complicated and hard to follow. Although I understood why, I thought dotting around colours endlessly wasn't needed after a certain point and prolonged the tutorial. I found much simpler ones that recreated bruises to the same standard, if not better.
|
#5 - This tutorial was very short in comparison but got straight to the point. There is only one product that is needed and this is of industry-standard, which makes it easy to recreate very realistic bruises. Essentially she was smearing it around but she was specific about the colours that needed to be used, so it is easy to recreate. In conjunction with other tutorials this is a good help.
|
My Own Method
What you will need:
Steps (to make a new-looking bruise)
Steps (to make an aged bruise)
What you will need:
- Red, blue, yellow, black and purple eyeshadows or face paints
- Make-up sponge
- Small, thin make-up brush
- Powder
Steps (to make a new-looking bruise)
- Take a small amount of brown and stipple onto the area where you want to situate the bruise. This will be the base of the bruise.
- Take a small amount of black and stipple onto the same area where you applied the black colour.
- Take a small amount of blue and stipple in the middle area of the bruise.
- Take small amounts of red and purple, stippling sparingly around the bruise.
- Blend the bruise so the lines don't look harsh.
- Use powder to set the make-up and mattify it to make it look more realistic.
Steps (to make an aged bruise)
- Dampen your make-up sponge.
- Take a small amount of yellow and stipple onto the area where you want to situate the bruise. This will be the base of the bruise.
- Take a small amount of purple and stipple in the middle are of the bruise sparingly.
- Take a very small amount of black and stipple around the area.
- Blend the bruise so the lines don't look harsh. Go over the purple colour again if it is blended in too much, only blending very slightly. This needs to be the most prominent colour.
- Use powder to set the make-up and mattify it to make it look more realistic.

This matte eyeshadow palette was used to create the bruise. The colours needed to be matte because a bruise isn't naturally shimmery or glittery.
Bruise In Action!

|
|
Other
- Smudged make-up
- Mud and dirt marks
- Messed up hair
- Missing parts of costume
Costume
All characters will be dressed in casual clothing. This is relative to the main setting of the trailer, a college. The clothing worn by the characters reflect modern teenage culture, their individual personalities (or the suppression of them) and their hierarchy in the peer structure of the college, e.g. the more popular students wear cooler clothes with the most popular labels, while the less popular students wear more plain, basic, less mainstream clothing. This could also suggest that the less popular students are afraid to express themselves openly through their choice of clothing as they are anxious of what the popular students would say, whilst the popular students wear the clothes they do as a sign of status amongst their peers, or more significantly, to stay being a part of the in crowd that also give them this status.
Nathan wears a plaid shirt layered with a plain black jumper, jeans and Converse-style shoes.

Johnny wears a dark blue hoodie with a typically geeky Black Ops t-shirt, black chinos and relatively understated Nike Air Jordans that he's had for a while.

In later scenes when he goes on his killing spree Johnny wears a mask. Initially because of time constraints it was decided that purchasing a mask would've been the easiest option, plus we didn't want to compromise the quality of the trailer in anyway. It was decided that we should get a mask reminiscent of the Friday the 13th film. However on arrival it was not what we expected and with further time constraints we decided it would be quicker to make a mask instead. Its process of creation is shown below.
Bobbi wears a tan leather jacket, white tank top, skinny denim jeans and strappy heeled sandals.

Sam wears a leather and woven varsity jacket, low-slung jeans that expose his boxers, a designer Ralph Lauren t-shirt and white Nike Air Forces.

Shelley wears a red Nike hoodie tied with a band at the back to emphasize her figure, a Nike t-shirt, extra tight jeans, red Nike dunks and lots of bracelets, bangles and a pair of big gold hoop earrings. And lots of make-up.

